
Want to know whether the Furniture Clinic Teak Cleaner | For Outdoor Patio Furniture Such as Teak & Other Wood Types | Clean, Remove, Dirt, & Other Stains | Restore Treated and Untreated Wood (17oz / 500ml) is the right solution for your outdoor wood care needs?
")
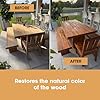
This image is property of Amazon.com.
 in detail.")
Product overview
You’ll find that this Teak Cleaner is a concentrated liquid formula designed specifically to remove dirt, grime, and weathering from outdoor wood. The product comes as a 17oz / 500ml bottle and is intended for repeat use because you dilute it at a 1:5 ratio with warm water.
What it is
You’re holding a wood cleaner made to clean and restore teak and other wood types used outdoors and indoors. It’s formulated to penetrate wood fibers and lift out surface contaminants, restoring natural color without needing aggressive sanding in many cases.
Who it’s for
If you own patio furniture, wooden decking, or indoor wood that’s been exposed to moisture and dirt, this cleaner is geared toward you. It suits both DIYers and people who want a straightforward maintenance step before oiling or sealing wood.
Key features and specifications
You’ll want to know the important specs and the capabilities before deciding to buy. Below is a clear breakdown of what the product delivers and why it matters for your wood maintenance routine.
| Feature | Details | Why it matters to you |
|---|---|---|
| Bottle size | 17oz / 500ml | Compact for storage, enough concentrate for several treatments depending on furniture size. |
| Concentration | 1:5 (cleaner : warm water) | High concentration stretches the bottle across multiple cleaning sessions, saving you money. |
| Surfaces | Teak, other hardwoods, treated & untreated wood | Versatile for different wood projects around your home and garden. |
| Action | Penetrates wood fibers to lift dirt and grime | Restores natural color and reduces the need for aggressive sanding. |
| Application tools | Scrubbing brush, lint-free cloth, water rinse | Uses basic tools most people already have; no special gear required. |
| Safety/handling | Requires mixing and rinsing | Handle with basic safety precautions—avoid contact with skin and eyes. |
| Outcome | Cleaner wood, reduced weathering appearance | Improves aesthetics and prepares wood for sealant or oil if you choose to follow up. |
You’ll see from the table that this cleaner balances performance with cost-effectiveness, and its concentrated nature makes it a good option if you have multiple pieces to maintain.
 on this page.")
How to use the Furniture Clinic Teak Cleaner
You’ll want to follow the manufacturer’s directions for best results, and this product is intentionally simple to apply. The basic steps are mixing, scrubbing, wiping, and rinsing.
Preparation
You should shake the bottle well before use to ensure the formula is properly blended. Prepare a bucket of warm water and gather a scrubbing brush, lint-free cloths, and a hose or clean water source for rinsing.
Mixing ratio and application
You need to mix at a 1:5 ratio — one part Teak Cleaner to five parts warm water — to get the recommended working strength. Pour the cleaner into the bucket, add warm water, and stir gently so you don’t create excess suds.
Scrubbing and lifting dirt
Dip your scrubbing brush into the mixture and work across the wood grain to loosen embedded dirt and grime. You’ll want to apply moderate pressure; the cleaner helps lift contaminants but physical action helps remove stubborn build-up.
Wiping and rinsing
After scrubbing, wipe the surface with a clean lint-free cloth to remove loosened dirt. Rinse thoroughly with clean water to eliminate any residual cleaner so no residues remain on the wood surface.
Drying and post-treatment
Allow the wood to dry fully before deciding on further treatments, like oiling or sealing. You’ll notice the wood’s natural tone returns as it dries, and you can choose whether to apply teak oil, wood sealer, or leave it untreated.
Performance and cleaning results
You’ll likely judge any cleaner by how effectively it removes grime and whether it changes the wood’s texture or integrity. This product focuses on cleaning without aggressive chemical bleaching.
Cleaning power
You should expect strong cleaning action on accumulated dirt and surface grime, especially when used with a proper scrubbing brush. The formula can remove a range of common stains associated with outdoor furniture, including pollen, mud, and light mildew.
Restoring color and grain
You’ll see color restoration because the cleaner penetrates into the grain and lifts soiling that has darkened the wood. This restores the natural look of the teak or other wood, often reducing the need for sanding to achieve a refreshed appearance.
Effects on treated vs untreated wood
You can use this cleaner on both treated and untreated wood; the results will differ slightly. On treated wood, you’ll remove surface contaminants while being careful not to strip finishes; on untreated wood, you’ll remove weathering and reveal the natural color more dramatically.
")
This image is property of Amazon.com.
Comparison with common alternatives
You’ll want to understand how this product stacks up against household options and other specialized cleaners. Here’s a comparison of performance and safety.
Versus mild detergent and soap
You can use dish soap or mild detergent in a pinch, but they often only lift surface oils and light dirt. The Furniture Clinic Teak Cleaner is formulated to penetrate wood fibers and remove deeper-seated grime, giving you better restoration results.
Versus bleach or strong oxidizers
You might see bleach or oxalic acid recommended for severe weathering or stains, but those can lighten wood unevenly and may damage fibers if misused. This cleaner gives a gentler, fiber-penetrating action that restores color without aggressive bleaching, making it safer for routine maintenance.
Versus teak oils and sealers
You’ll use oils and sealers for protection and sheen after cleaning, not as cleaners themselves. Teak oil will enhance color and protect wood, but it won’t remove embedded dirt as effectively; this cleaner prepares the wood for subsequent oil or sealer applications.
Pros and cons
You’ll want a clear list of benefits and trade-offs to decide if this product fits your routine and priorities.
Pros:
- You’ll get a concentrated formula that stretches across multiple uses, making it cost-effective.
- You’ll be able to restore color and remove embedded grime without heavy sanding.
- You’ll appreciate the straightforward mixing and application process that uses common tools.
- You’ll find it suitable for a variety of woods, both indoors and outdoors.
Cons:
- You’ll need to do manual scrubbing for best results, which means some elbow grease.
- You’ll need to rinse thoroughly and avoid letting residue dry on the surface.
- You’ll have to follow safety precautions to avoid skin and eye contact.
- You’ll likely need a follow-up protection step, such as oil or sealer, to preserve results.
You’ll notice that most drawbacks come down to normal maintenance effort rather than product failure.
")
This image is property of Amazon.com.
Practical tips and best practices
You’ll get better and longer-lasting results when you follow a few tried-and-tested practices. These tips help you clean efficiently and protect your wood afterward.
- Test in an inconspicuous area first: You’ll want to test the diluted solution on a hidden part of the wood to confirm there’s no unexpected color change. This also shows you how quickly the cleaning action works so you can adjust pressure accordingly.
- Use the right brush: You’ll get the best results with a medium-stiff bristle brush that won’t gouge the wood but will lift grime effectively. Avoid wire brushes or overly firm tools that can damage wood fibers.
- Work along the grain: You’ll scrub with the grain, not across it, to avoid creating scratches and to help lift contaminants from the wood fibers.
- Avoid direct sunlight and very hot surfaces: You’ll work more effectively in mild conditions because the cleaner won’t evaporate too quickly and you’ll reduce streaking or uneven cleaning.
- Follow with a preservative: After using the cleaner and letting the wood dry, you’ll extend the fresh appearance by applying teak oil, sealer, or a water-repellant finish.
- For tough stains use repeat treatments: You’ll sometimes need a second application for deeply embedded stains; wait between treatments and don’t over-scrub a single area.
You’ll get the most out of the product when you combine the manufacturer’s directions with these practical habits.
Safety and environmental considerations
You’ll want to keep safety in mind while using any concentrated cleaning product. The manufacturer’s guidance and common-sense precautions will keep you safe and reduce environmental impact.
Skin and eye safety
You should always wear gloves and avoid splashing cleaner into your eyes; if contact occurs, rinse thoroughly with clean water. If you have sensitive skin, wear long sleeves and protective eyewear; seek medical advice if irritation persists.
Environmental impact
You’ll rinse the product off into the surrounding area; use care so runoff won’t directly enter sensitive planting areas or storm drains. You should contain rinse water where practical, and consider using collected rinse water for non-sensitive garden areas if allowed by local regulations.
Disposal and storage
You’ll store the bottle tightly sealed in a cool, dry place away from children and pets. Dispose of empty containers according to local hazardous waste rules if required; don’t pour concentrated leftover cleaner down drains without diluting and rinsing as recommended.
You’ll find that following these safety and environmental steps keeps your cleanup efficient and responsible.
")
This image is property of Amazon.com.
Frequently asked questions (FAQ)
You’ll have practical questions before and after using any cleaner, so the answers below will help you plan and troubleshoot.
Q: Can you use the cleaner on painted or varnished wood?
You should avoid aggressive scrubbing on painted or varnished surfaces since the cleaner may affect the finish. You’ll test a small area first, and if the finish lifts, consider using milder soap and water instead.
Q: Does it remove mildew and algae stains?
You’ll find it effective at removing surface mildew and algae with proper scrubbing when the growth is light to moderate. For heavy biological growth, you may need a specialized biocide treatment followed by the cleaner.
Q: Is it safe for indoor wood?
You can use it on indoor wood, but you’ll want good ventilation and to rinse thoroughly, as indoor surfaces are more sensitive to residues. You’ll also want to test in a hidden area to ensure finish compatibility.
Q: How long before you can oil or seal the wood after cleaning?
You’ll want to wait until the wood is completely dry, which typically takes 24–48 hours depending on temperature and humidity. Applying oil or sealer too soon will trap moisture and lead to poor adhesion and shorter lifespan of the finish.
Q: Can it be used on composite decking or laminated surfaces?
You should avoid using it on composite decking or delicate laminate surfaces without testing, because the product is formulated for natural wood. You’ll test a small area and check with the decking manufacturer for recommended cleaning products.
Q: How much area does one bottle cover?
You’ll coverage depends on how concentrated you mix it and how dirty the wood is, but one 500ml bottle stretched at 1:5 can cover multiple mid-size furniture pieces or a small deck area. You’ll estimate usage by mixing a batch and noting how much surface area you get per bucket.
Q: Does it bleach wood?
You won’t get aggressive bleaching like you would from strong oxidizers; the cleaner restores natural color by removing soiling rather than stripping pigment. If you need a bleached effect for matching or finishing, you’ll use a different product like oxalic acid under careful guidance.
Q: Is rinsing with cold water acceptable?
You’ll get better solubility and less streaking with warm water, but cold water will still work if warm water isn’t available. You’ll notice slightly slower cleaning action in colder water, so be prepared to scrub a bit more.
Q: Is it pet- and child-safe after rinsing?
You’ll minimize risk by rinsing thoroughly and keeping children and pets away until surfaces are dry. After proper rinsing and drying, the surface should be safe for normal use.
You’ll find that these FAQs answer most common concerns and prepare you for typical cleaning scenarios.
Real-world use cases and scenarios
You’ll get different kinds of results depending on the project, and here are typical situations where this product shines.
Patio dining sets and loungers
You’ll use the cleaner to remove months of pollen, bird droppings, and grime from teak chairs and tables. After cleaning, you’ll either leave the teak to silver naturally or apply oil to maintain the rich golden tone.
Garden benches and planters
You’ll treat benches that collect soil and plant residues by scrubbing gently to avoid sanding away shaped edges. You’ll find the cleaner useful to bring back a natural look before a seasonal refresh.
Indoor antique or weathered wood
You’ll carefully use the cleaner on antique indoor pieces that have accumulated dirt but still retain their finish. You’ll test first, rinse thoroughly, and consider a restorative oil or wax after drying to protect the patina.
Boat trim and marine use
You’ll use it cautiously on marine wood trims, as salt and weathering can be extensive; the product helps lift embedded salt and grime. You’ll rinse well and follow up with marine-grade protection suited to saltwater exposure.
You’ll see that the cleaner adapts to many practical situations but always requires testing and appropriate follow-up protection.
This image is property of Amazon.com.
Troubleshooting common problems
You’ll encounter issues rarely, and knowing how to handle them saves time and preserves the wood surface.
- Uneven cleaning: You’ll likely have applied the mixture unevenly or worked in varying sun exposure. You’ll rework the affected areas with the same diluted solution and a consistent scrubbing pattern along the grain.
- White residue after drying: You’ll usually see residue if the cleaner wasn’t rinsed thoroughly. You’ll re-rinse and wipe with a clean cloth, or a light additional rinse with warm water to eliminate remaining traces.
- Stubborn dark stains: You’ll sometimes need repeat applications or to use an appropriate stain remover specifically formulated for tannin or rust stains. You’ll avoid aggressive sanding unless necessary to remove deeply embedded discoloration.
You’ll find these fixes are straightforward if you follow the product steps and patience.
Cost-effectiveness and value
You’ll weigh upfront cost against how many treatments you can get and the quality of results. Because the cleaner is concentrated, one bottle stretches further than ready-to-use products.
You’ll save money when you treat multiple pieces or maintain furniture seasonally instead of replacing wood prematurely. You’ll note that paying a bit more for a product designed for wood often means better restoration without aggressive procedures.
Packaging and availability
You’ll typically see the product sold online and in some specialized hardware or marine stores. The compact 17oz / 500ml bottle fits easily on a shelf, and the label includes dilution instructions you should follow.
You’ll check the packaging for batch and safety information, and if you need more volume for a larger project, you’ll consider buying multiple bottles or bulk sizes if the brand offers them.
What you’ll need alongside the cleaner
You’ll prepare a few common tools to achieve the best results, most of which you probably already have at home.
- Bucket for mixing
- Warm water source
- Medium-stiff scrubbing brush
- Lint-free cloths for wiping
- Hose or clean water for rinsing
- Gloves and protective eyewear for safety
You’ll avoid improvising with abrasive tools that can scratch and damage wood surfaces.
Maintenance schedule recommendations
You’ll get the most aesthetic and structural benefit by cleaning and protecting wood periodically. A simple schedule keeps furniture in good condition and reduces long-term repair needs.
- Light maintenance: You’ll clean once or twice a year for furniture stored outdoors and exposed to the elements. This removes seasonally accumulated dirt and prepares wood for protective oiling.
- Moderate maintenance: You’ll clean every 3–6 months for high-use areas or locations under trees that drop sap or pollen. You’ll follow cleaning with a protective treatment to maintain color and repel moisture.
- Deep maintenance: You’ll do a deeper cleaning and inspection yearly, potentially using more concentrated cleaning or spot restoration for damaged areas. You’ll follow with a comprehensive sealing or oiling treatment before peak outdoor use.
You’ll adapt the schedule to your local climate and frequency of use; humid climates and coastal locations often need more frequent care.
Final verdict
You’ll find Furniture Clinic Teak Cleaner to be a practical, concentrated cleaner that effectively removes dirt, grime, and signs of weathering from teak and other wood types. When you use it correctly — testing first, scrubbing with the grain, rinsing thoroughly, and following up with a protective finish — you’ll restore and preserve your wood surfaces with minimal fuss.
You’ll appreciate the concentration and versatility, but you should be ready for the physical scrubbing and the need for a follow-up protective treatment. Overall, this product is a solid option for anyone who wants a reliable step in wood maintenance without resorting to harsh bleaches or aggressive sanding.
 on this page.")
Disclosure: As an Amazon Associate, I earn from qualifying purchases.


Christopher Knight Home Esme Outdoor Acacia Wood Bench, Teak Finish
27% Off


Furniture Clinic Teak Oil | Wood Oil Protects & Cleans Outdoor & Indoor Furniture, Boats, Shower Benches | Restore & Protect Wood, Prevent Drying & Other Damage | Natural Matte Finish | 17oz/500ml
10% Off
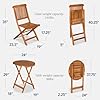


Best Choice Products 3-Piece Acacia Wood Bistro Set, Folding Patio Furniture for Backyard, Balcony, Deck w/ 2 Chairs, Round Coffee Table, Teak Finish - Natural
11% Off

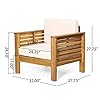


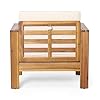
Christopher Knight Home Louver Club Chairs, Teak + Cream
$390.99 (as of March 6, 2026 02:24 GMT -05:00 - More infoProduct prices and availability are accurate as of the date/time indicated and are subject to change. Any price and availability information displayed on [relevant Amazon Site(s), as applicable] at the time of purchase will apply to the purchase of this product.)


Signature Design by Ashley Clare View Outdoor Patio Sofa, 4 Throw Pillows, Nuvella Weather Resistant Fabric, Eucalyptus Wood, 81" W x 35" D x 32" H, Beige
$1,369.99 (as of March 6, 2026 02:24 GMT -05:00 - More infoProduct prices and availability are accurate as of the date/time indicated and are subject to change. Any price and availability information displayed on [relevant Amazon Site(s), as applicable] at the time of purchase will apply to the purchase of this product.)


Lokingrise 4-Piece Deep Seating Teak Wood Patio Furniture Set, Acacia Wood Outdoor Conversation Sofa Set with Cushioned Loveseat, Armchairs and Coffee Table for Garden, Deck, Backyard
$859.99 (as of March 6, 2026 02:24 GMT -05:00 - More infoProduct prices and availability are accurate as of the date/time indicated and are subject to change. Any price and availability information displayed on [relevant Amazon Site(s), as applicable] at the time of purchase will apply to the purchase of this product.)


Merax Outdoor Acacia Wood Conversation Set, 3-Seat Loveseat Sofa w/Coushion and Round Coffee Table for Backyard, Patio Furniture, Teak+Beige
$519.99 (as of March 6, 2026 02:24 GMT -05:00 - More infoProduct prices and availability are accurate as of the date/time indicated and are subject to change. Any price and availability information displayed on [relevant Amazon Site(s), as applicable] at the time of purchase will apply to the purchase of this product.)![[3 PIECE SET] This patio conversation set includes: 2 patio lounge chairs and 1 patio side table. [PREMIUM TEAK WOOD] Sourced from sustainable forests, our patio conversation set is expertly crafted from high-quality teak wood, ensuring both durabili...](https://m.media-amazon.com/images/I/61RlGdGcaiL._SL160_.jpg)


Cambridge Casual Robin Teak Wood 3 Piece Patio Conversation Set with Oyster Cushion
$994.70 (as of March 6, 2026 02:24 GMT -05:00 - More infoProduct prices and availability are accurate as of the date/time indicated and are subject to change. Any price and availability information displayed on [relevant Amazon Site(s), as applicable] at the time of purchase will apply to the purchase of this product.)


PURPLE LEAF 11 Pieces Patio Dining Set Wicker Outdoor Furniture Rectangular Table and Chairs Set for Garden Deck Teak-Finish Aluminum Frame Backyard Kitchen Set, Cushions and Pillows Included
$2,099.00 (as of March 6, 2026 02:24 GMT -05:00 - More infoProduct prices and availability are accurate as of the date/time indicated and are subject to change. Any price and availability information displayed on [relevant Amazon Site(s), as applicable] at the time of purchase will apply to the purchase of this product.)![[Versatile Outdoor Modular Sofa Set] This 6-piece acacia wood patio furniture set features a customizable L-shaped configuration with 3 armless chairs, 1 corner sofa, 1 ottoman, and 1 tea table – ideal for dynamic outdoor entertaining. The modular de...](https://m.media-amazon.com/images/I/51CUH9Yb9gL._SL160_.jpg)


Merax 6 Pieces Patio Furniture Set, Outdoor L-Shaped Sectional Sofa Set with Coffee Table, Acacia Wood Conversation Seating & Cushions and Lumbar Pillows, for Garden, Poolside and Backyard, Teak+Beige
$899.99 (as of March 6, 2026 02:24 GMT -05:00 - More infoProduct prices and availability are accurate as of the date/time indicated and are subject to change. Any price and availability information displayed on [relevant Amazon Site(s), as applicable] at the time of purchase will apply to the purchase of this product.)
Now retrieving an image set.
Greesum Patio Furniture 4 Pieces Conversation Sets Outdoor Wicker Rattan Chairs Garden Backyard Balcony Porch Poolside loveseat with Soft Cushion and Glass Table, Brown and Beige
$145.99 (as of March 6, 2026 17:36 GMT -05:00 - More infoProduct prices and availability are accurate as of the date/time indicated and are subject to change. Any price and availability information displayed on [relevant Amazon Site(s), as applicable] at the time of purchase will apply to the purchase of this product.)
Now retrieving an image set.
Homall 4 Pieces Outdoor Patio Furniture Sets Rattan Chair Wicker Set,Outdoor Indoor Use Backyard Porch Garden Poolside Balcony Furniture (Brown and Beige)
$139.99 (as of March 6, 2026 17:36 GMT -05:00 - More infoProduct prices and availability are accurate as of the date/time indicated and are subject to change. Any price and availability information displayed on [relevant Amazon Site(s), as applicable] at the time of purchase will apply to the purchase of this product.)
Now retrieving an image set.
Wisteria Lane 4 Piece Patio Furniture Set, Wicker Outdoor Patio Conversation Furniture Set, All Weather Outdoor Patio Sofa with Cushion and Glass Table, Ash Gray
$329.99 (as of March 6, 2026 17:36 GMT -05:00 - More infoProduct prices and availability are accurate as of the date/time indicated and are subject to change. Any price and availability information displayed on [relevant Amazon Site(s), as applicable] at the time of purchase will apply to the purchase of this product.)
Now retrieving an image set.
Murago 3 Piece Wicker Patio Bistro Set, Rattan Conversation Set with Coffee Table, for Balcony, Porch, Garden, Yard, Poolside, Black Frame with Black Cushion
$69.99 (as of March 6, 2026 17:36 GMT -05:00 - More infoProduct prices and availability are accurate as of the date/time indicated and are subject to change. Any price and availability information displayed on [relevant Amazon Site(s), as applicable] at the time of purchase will apply to the purchase of this product.)
Now retrieving an image set.